Introduction: The Allure of Natural Scents in Homemade Candles
You know that sharp headache you get from cheap candles? The kind that smells like “Purple Flavor” instead of actual lavender?
Yeah, we’ve all been there.
That is exactly why so many of us are taking matters into our own hands. We want our homes to smell like nature, not a factory. It turns out, this is becoming a massive movement. Reports show that consumer demand for natural home fragrances is shooting up, with the market expected to hit billions by 2025. People are checking labels. They want wellness, not just smells.
But here is where it gets messy.
You might start searching online and see the phrase “essential fragrance oils for candles.” It sounds like the best of both worlds, right?
Actually, wait—that term is pretty confusing.
It usually tricks beginners. You generally have Essential Oils (which are 100% natural plant extracts) and Fragrance Oils (which are synthetic). They are two totally different things. Mixing them up is the number one reason DIY essential oil candles fail or become unsafe.
Using pure essential oils—like the lab-tested ones we source for clients at Aroma Monk—is an art form. It’s not as simple as just dumping drops into hot wax. Real oils are delicate. If you get the temperature wrong, the scent disappears. If you use too much, it can even be a fire hazard.
Don’t worry, though. We are going to fix that.
This guide will clear up the confusion around scenting candles with essential oils. We’ll look at what oils are safe, which ones actually smell strong, and the specific tricks to make the scent throw last.
Ready to make something that smells real? Let’s figure this out.
Essential Oils vs. Fragrance Oils: What Candle Makers Must Know
First things first—let’s clear up that confusing term from the intro.
You might see “essential fragrance oils for candles” listed on some websites or cheap labels. Honest truth? That is usually marketing fluff designed to confuse you. In reality, you have two very different players in the candle game.
We need to understand the difference before we melt a single ounce of wax.

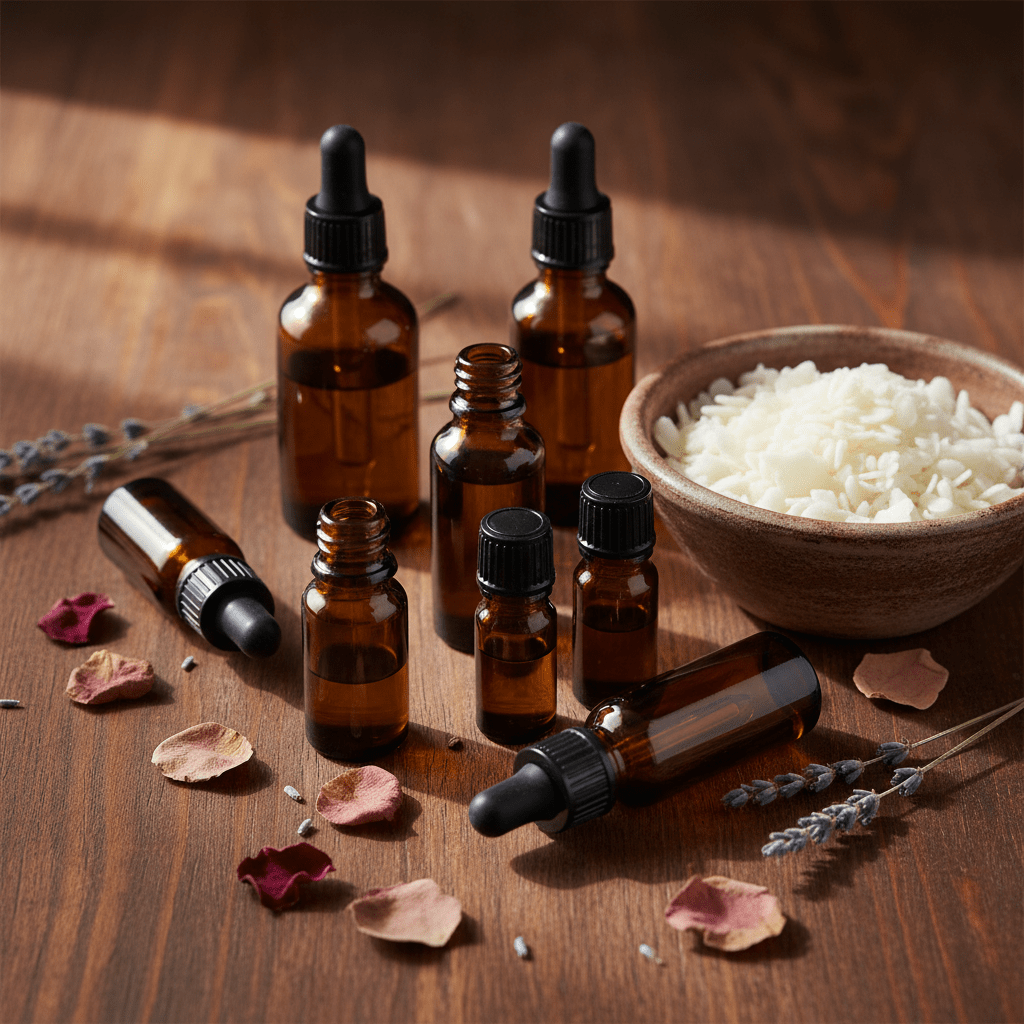
The Real Deal: Essential Oils (EOs)
These are the heavy hitters from nature. Essential oils are liquids extracted directly from plants—flowers, bark, roots, you name it. When you buy a bottle of pure lavender essential oil, you are getting the concentrated soul of that plant.
Because they are 100% natural, they bring actual aromatherapy benefits. This is exactly what we specialize in at Aroma Monk. We test ours in the lab to make sure there are no hidden nasties.
But working with them is tricky. They vary from batch to batch because, well, nature changes. A rainy season might change how the oil smells compared to a dry season.
The Lab Creation: Fragrance Oils (FOs)
Fragrance oils are synthetic. They are made in a lab.
Scientists design them specifically to stick to wax and smell super strong when you burn them. That’s why a “Birthday Cake” candle smells so strong across the room. It is engineered to do that. They don’t have natural health benefits, but they are easier for beginners to handle.
So, Which One Wins?
It depends on what you care about.
If you just want a candle that smells loud and costs pennies to make, fragrance oils are the easy route. They are cheap and consistent. But if you are chasing wellness or want a non-toxic home, you want natural oils for candle making.
Here is a quick breakdown of why this matters for your wallet and your nose:
- Cost: Pure essential oils can cost significantly more—sometimes over $28 per ounce retail—while synthetic versions cost a tiny fraction of that.
- Performance: Fragrance oils are scientifically engineered with fixatives so the scent lasts a long time. Essential oils are volatile (they evaporate fast), so they need special care during the making process.
- Health: Only essential oils offer true aromatherapy benefits.
The market is shifting, though.
More people are reading labels now. Reports show that consumer demand for natural home fragrances is growing fast. We are seeing businesses move away from synthetic smells because customers want products that support their wellness, not just cover up odors.
It is a bigger investment to use real oils, sure. But the payoff is a product that is actually good for you.
Now that we know who is who, let’s talk about why scenting these candles is so darn difficult compared to the fake stuff.
The Top 12 Essential Oils Proven to Work in Candles
Here is the sad truth simply put.
Most essential oils are wimps when it comes to heat.
You can buy a beautiful bottle of expensive rose oil, drop it into 160°F wax, and… poof. The scent vanishes before the candle even cools down. It feels like throwing money into a fire.
But don’t give up yet.
I learned this the hard way after ruining about three batches of soy wax. It turns out, some oils are survivors. They handle the heat, stick around, and actually throw a scent when you light the wick.
We call these the best essential oils for candles. If you are looking to make DIY essential oil candles that don’t just smell like plain wax, stick to this list of 12 heavy hitters.
The “Wake Up” Crew (Citrus & Top Notes)
These are the first smells you notice. They are bright and happy.
1. Sweet Orange
This is usually a crowd favorite. It smells like peeling a fresh orange. It’s cheery and cheap compared to other oils.
- Performance: surprisingly good, but it fades fast if you don’t mix it with a wood scent.
2. Bergamot
Think Earl Grey tea. It is citrusy but fancy. It has a slightly floral edge that makes a candle feel expensive.
- Best Blended With: Lavender or Geranium.
3. Grapefruit (Pink or White)
Sharp and tangy. It cuts through bad odors in a kitchen really well.
A Warning on Citrus:
These are “Top Notes.” That means they evaporate quickly. If you pour your wax too hot (above 170°F), you might kill the scent instantly. We call this “burning off.” Plus, as safety guides warn us, citrus oils have low flash points—meaning they are highly flammable so be careful near open flames during the making process.
The “Spa Day” Vibes (Herbal & Fresh)
Want your bathroom to smell like a fancy health club? Use these. They are usually very strong.
4. Eucalyptus
This is one of the strongest smelling essential oils for candles. It clears your nose and smells excessively clean.
- Pro Tip: A little goes a long way. Too much and it smells like a cough drop.
5. Peppermint
Sweet, icy, and sharp. It is amazing for holiday candles.
- Performance: Very strong throw. It tends to overpower other scents, so use it sparingly in blends.
6. Lemongrass
If I had to pick one oil that always works, it is Lemongrass. It is loud. It sticks to soy wax like glue. If you want a guaranteed win for your first candle, start here.
The Heart (Floral)
These are the middle notes. They give the candle its main character.
7. Lavender
Of course, right? It is the most popular oil for a reason.
But be careful where you buy it. Cheap “lavender” is often synthetic. Real natural oils for candle making—like the certified pure batches we supply at Aroma Monk—have a dustier, more herbal smell than the fake stuff.
8. Geranium
Here is a secret: Pure Rose oil is insanely expensive. I’m talking hundreds of dollars. Geranium smells very similar to rose but costs way less. It is green, floral, and very potent.
9. Ylang Ylang
Exotic and heavy. It smells like tropical flowers. It is creamy and deep, making it perfect for romantic candles.
The Anchors (Woody & Earthy)
You need these. These are “Base Notes.” They are heavy molecules that don’t evaporate easily. They help “fix” the lighter scents (like orange) so they last longer.
10. Cedarwood (Atlas or Virginia)
If you want that cozy, cabin-in-the-woods smell, this is it.
- Atlas Cedarwood: Smells warm and balsamic.
- Virginia Cedarwood: Smells like a pencil shaving (dry wood).
11. Patchouli
Love it or hate it, Patchouli is a beast. It lasts forever. It adds a rich, dirt-like sweetness that grounds any floral blend. It’s a classic fixative.
12. Clove Bud
Spicy and warm. It smells like fall.
Safety Alert: Clove is a “hot oil.” It can irritate skin easily. Use it in small amounts, mainly to spice up an orange or woody blend.
Making Them Stick: The Blending Cheat Sheet
Now, you can just pour one oil in. But the magic happens when you mix them.
When we create blends for clients at Aroma Monk, we follow a simple rule to make the scent last: The 30-50-20 Rule.
- 30% Top Notes (Citrus)
- 50% Middle Notes (Herbal/Floral)
- 20% Base Notes (Woody)
Here are three foolproof recipes you can try right now:
The “Sleep Tight” Blend
- 5 parts Lavender (Middle)
- 3 parts Bergamot (Top)
- 2 parts Cedarwood (Base)
The “Morning Focus” Blend
- 4 parts Grapefruit (Top)
- 4 parts Rosemary (Middle)
- 2 parts Patchouli (Base – just a dash to hold it together)
The “Clean Kitchen” Blend
- 6 parts Lemon (Top)
- 3 parts Eucalyptus (Top/Middle)
- 1 part Clove (Base)
Flash Points Matter (Don’t Burn Your House Down)
You might see the term “Flash Point” on a safety sheet. This is the temperature where the vapors from the oil can catch fire if there is a spark.
Also, if you add an oil with a low flash point into super hot wax (like 185°F), it might just evaporate immediately. That means a scentless candle.
Here is a quick look at the temperatures you need to watch out for:
| Essential Oil | Est. Flash Point | Volatility | Note |
|---|---|---|---|
| Sweet Orange | ~115°F (46°C) | High | Adds fast burst of scent |
| Eucalyptus | ~120°F (49°C) | High | Clears the room quickly |
| Lavender | ~150°F (65°C) | Medium | The standard balance |
| Peppermint | ~150°F (66°C) | High | Very dominating scent |
| Cedarwood | >200°F (93°C) | Low | Stays in the wax perfectly |
| Patchouli | >200°F (93°C) | Low | The anchor for your blend |
Basically, the lower the flash point, the cooler your wax should be when you add the scent (usually around 135°F – 150°F is the sweet spot for soy wax).
It sounds like science class, I know. But once you mix that first batch that smells like real lavender fields instead of purple candy, you won’t care about the extra effort.
So, we have our oils. We know which ones work. But how much do we actually put in the jar?
Get a quote from Aroma Monk.
Essential Oil Supplier – Bulk pricing • Samples • Fast response
Safety First: Understanding Flash Points and Usage Rates
This next part scares people sometimes.
But it shouldn’t.
We just need to talk about chemistry for a quick second. Because if you get this wrong, your candle won’t smell like anything. Or worse, it could actually be dangerous.
When we talk about essential oil candle making safety, there is one term you have to know: Flash Point.
What is a Flash Point?
Think of it as the “Danger Zone.”
The flash point is the specific temperature where an oil gets so hot that its vapors can catch fire if a flame is nearby. Every oil is different.
For example, a heavy oil like Cedarwood can handle high heat (over 200°F). But a light citrus oil like Lemon? It has a much lower flash point. If you drop Lemon oil into super hot wax at 185°F, two bad things happen:
- The Scent Vanishes: The heat instantly burns off the smell. You wasted your oil.
- Fire Risk: It creates vapors that are flammable.
So, learning how to use essential oils in candles starts with a thermometer. You have to wait for the wax to cool down before you add the scent.

The Golden Ratio: Fragrance Load
Okay, so the wax is cooling. How much oil do you pour in?
Beginners usually guess. They shake the bottle until it “looks good.”
Please don’t do that.
If you use too little, the candle smells weak. If you use too much, the wax can’t hold it all. The oil actually seeps out of the candle like sweat. This is called “leeching,” and it is a major fire hazard because pure essential oils are flammable.
We need to look at Fragrance Load. This stands for the percentage of oil compared to the wax.
For most natural soy waxes, the magic number is between 6% and 10%.
Here is the easy math:
- For a subtle scent (6% load): Use about 1 ounce of essential oil for every 1 pound (16 oz) of wax.
- For a stronger scent (10% load): Use about 1.5 ounces of oil for every 1 pound of wax.
Experts say that synthetic oils and fixatives bind easily with wax, but natural oils struggle a bit more. That is why staying within that 6-10% limits is so important. It keeps the structure of the candle safe.
The Step-By-Step Pouring Method
I messed this up a lot when I started. I was too impatient.
Here is the exact method we recommend to our bulk clients at Aroma Monk to get it right every time:
- Melt the Wax: Heat your soy wax to about 185°F so it melts completely.
- The Waiting Game: Take the pot off the heat. staring at the thermometer. It takes longer than you think.
- Check Your Oil: Look at the flash point of the oil you are using. Let’s say you are using Lavender (Flash point ~150°F).
- The Pour: Once your wax cools to about 135°F–145°F, pour in your weighed oil.
- The Stir: This is the secret sauce. Gently stir for a full two minutes. You need to force the oil and wax to become friends.
If you follow these temps, you avoid burning off those precious top notes.
Now that you know how to add the scent safely, let’s look at the actual benefits you get from burning these (besides just a nice smell).
Techniques for a Stronger Scent Throw with Natural Oils
You did everything right.
You bought the expensive lavender oil. You measured it carefully. You poured it at the right temperature. But then you lit the candle a week later, and…
Nothing.
Maybe a faint whiff of flowers, but definitely not the room-filling aroma you wanted. It is incredibly preventing.
Here is the thing about DIY essential oil candles. Nature is quiet. Unlike synthetic fragrance oils that are designed to scream, essential oils whisper. To make them louder, you have to master a few technical tricks.
It isn’t just about dumping more oil in. It is about physics.
1. The Wax Trap (And Why Soy is Tricky)
Most of us use soy wax because it is natural. We love that.
But soy wax has a personality. On a microscopic level, it forms crystals as it cools. If those crystals don’t form correctly, they push the oil out nicely. Or, they trap it so tight it never releases.
Synthetic fragrances are engineered to work with these crystals easily. Natural oils? Not so much.
Scientists explain that synthetic oils don’t actually “bind” to wax perfectly either, but they are stabilized with chemical fixatives that natural oils just don’t have. This means you might need to pick a softer soy wax blend—like Soy 464—which is famous for holding scent better than harder waxes.
A Quick Fix:
Some makers use a tiny bit of an additive called Vybar 260. It acts like a glue that helps the oil and wax stick together. Just a teaspoon can double your scent throw.
2. The Wick is the Engine
This is where 90% of beginners fail.
The wick isn’t just a string. It is a fuel pump.
Its job is to melt a pool of wax. The scent is trapped in that wax. The scent only releases into the air when the wax melts.
- Wick too small: It creates a tiny tunnel down the center. Most of the scented wax stays hard and cold on the sides. No melt pool = no smell.
- Wick too big: It burns too hot. It destroys the delicate essential oils before they can smell nice.
You need a wick that creates a full melt pool (liquid wax touching the glass edges) within about two hours.
3. The Grand Patience Test (Curing)
I hate this step. I really do.
You want to burn your candle immediately. But you can’t.
If you light a soy candle the day after you make it, the scent will be weak. The oil and wax haven’t had time to bond yet. They are still just sitting next to each other.
Experts agree that while paraffin wax might be ready in just a few days, vegetable waxes like soy need time to harden and settle. The general rule is to let your candle sit in a dark, cool place for at least two weeks.
That creates what we call the “Hot Throw”—the smell when the candle is burning.
4. Quality In, Quality Out
Lastly, you can’t fix bad ingredients with good technique.
If your oil is watered down with cheap fillers, it won’t throw a scent no matter how long you cure it. That is why we are so obsessive about purity at Aroma Monk. When you start with 100% pure lab-tested oil, you don’t have to fight as hard to get a good result.
So, you have the wax, the wick, and the patience. You are almost a pro.
But there is one more fun part—mixing your own signature smells.
Beginner’s Guide to Blending Essential Oils for Signature Scents
Now comes the part where you get to play mad scientist.
Sure, a single-note candle—like just plain Lavender—is nice. It’s safe. But have you ever walked into a high-end boutique and smelled a candle that you couldn’t quite put your finger on? It wasn’t just “lemon.” It was complex. It told a story.
That is the power of blending.
And here is the cool part: you don’t need a chemistry degree to do it. You just need to understand how scent behaves in the air. We call this the Fragrance Pyramid.
The Pyramid: How Scent Travels
When you light a candle, the smells don’t all hit your nose at the exact same time. They release in waves. To create a balanced essential oil blend for soy candles, you need to stack these waves so there is never a dull moment.
1. The Top Notes (The Hello)
These are the lightweight molecules. You smell them the second you take the lid off the jar. They are bright and flashy but burn off quickly (usually within the first 15-30 minutes).
- Think: Bergamot, Sweet Orange, Grapefruit, Eucalyptus.
2. The Middle Notes (The Heart)
These are the core of your candle. They emerge once the top notes fade and make up the main body of the scent. They regulate the blend.
- Think: Lavender, Geranium, Rosemary, Ylang Ylang.
3. The Base Notes (The Anchor)
These are the heavyweights. They linger for hours, even after you blow the candle out. They are rich and deep, providing a foundation that holds the lighter scents down so they don’t float away too fast.
- Think: Cedarwood, Patchouli, Clove.
The Golden Ratio: 30-50-20
If you just throw oils into a pot randomly, you usually end up with something that smells like… well, mud.
To keep it crisp, experts recommend specific ratios. According to blending guides from New Directions Aromatics, a balanced blend usually follows the 30-50-20 rule:
- 30% Top Notes
- 50% Middle Notes
- 20% Base Notes
It works almost every time. It gives you that bright opening, a solid heart, and a lasting finish.

3 Signature Recipes to Try at Home
Ready to mix? I’ve tested these myself. They are stable, safe, and smell like you paid $40 for the jar.
Note: These parts are versatile—you can measure in drops or grams depending on your batch size.
1. The “Cozy Woods” Blend
This is my go-to for fall and winter. It smells like a warm flannel shirt. The orange brightens up the heavy wood, while the clove adds just a tiny kick of heat. It’s a perfect aromatherapy candles recipe for grounding yourself after a chaotic week.
- 3 parts Sweet Orange (Top)
- 5 parts Cedarwood (Base – we bumped this up for extra woodiness)
- 2 parts Clove Bud (Middle/Base)
2. The “Calm Garden” Blend
If you want your living room to feel like a spa, this is it. It’s floral but not “grandma’s perfume” floral. The Bergamot cuts through the sweetness to keep it fresh.
- 3 parts Bergamot (Top)
- 5 parts Lavender (Middle)
- 2 parts Geranium (Middle/Base equivalent)
3. The “Deep Focus” Blend
Need to get work done? This blend wakes up your brain without being jittery.
- 3 parts Lemon (Top)
- 5 parts Rosemary (Middle)
- 2 parts Patchouli (Base)
A Quick Pro-Tip on Testing
Here is a mistake I made: I used to mix oils directly into the hot wax to “test” them. If I didn’t like it, I ruined the whole batch.
Instead, grab a cotton ball.
Put your drops on the cotton ball, put it in a small glass jar, and close the lid. Wait an hour, then open it and take a whiff. That is essentially what your candle will smell like (your own custom essential fragrance oils for candles blend, essentially). If you like it largely, multiply the drops to get the ounces you need for the big pour.
At Aroma Monk, we see people creating incredible things just by experimenting with these basics. You don’t need a massive lab; you just need good ingredients and a little curiosity.
Now that you have your blend, let’s talk about the final hurdle: Troubleshooting the things that go wrong.
Conclusion: Start Your Natural Candle Making Journey with Confidence
Let’s be real for a second.
Making candles with essential fragrance oils for candles—or just pure essential oils, as we now know they should be called—is harder than using the fake stuff. It just is. The synthetic oils are built to be easy. Nature makes you work for it.
But the payoff? It is huge.
The numbers back this up. We see that consumer demand for natural home fragrances is exploding right now. People are totally over the headaches they get from cheap, chemical smells. They want the real deal.
So, please don’t let the technical side scare you off.
We covered a lot today. We looked at why essential oil candle making safety matters—especially checking those flash points so you don’t accidentally burn off your scent or create a fire hazard. We also talked about the “Cure”—that annoying two-week waiting period that lets the soy wax and oil finally bond.
It sounds like a lot of rules. But it is really just a recipe.
Here is your homework.
Don’t try to mix a complex 12-oil blend today. Just pick one versatile oil from our list—like Lavender or Eucalyptus. Grab a bottle of high-quality, lab-tested oil (this is where we step in at Aroma Monk to make sure you start with the best ingredients).
Make one small tester candle. Write down your pour temperature. Write down your usage rate. Then, put it in a cupboard and wait.
If it smells amazing? You win. If it’s faint? You just tweak the ratio next time.
You are building a craft here, not just a decoration. And trust me, once you smell the difference, you won’t go back.
Get a quote from Aroma Monk.
Essential Oil Supplier – Bulk pricing • Samples • Fast response