Unlock the Secret to Creating Your Own Signature Scent, Naturally
You know that sinking feeling?
You mix your favorite essential oils together. It smells amazing in the bottle. You put it on your wrist, feeling like a genius. But then… twenty minutes later?
Poof. Gone.
It’s frustrating. I get it. I’ve poured plenty of expensive oils down the drain trying to get it right. The problem isn’t usually the oils themselves. It’s the structure.
Most DIYers just mix scents they like. But without a plan, those scents fall flat or fade away instantly. They lack depth.
Here is the secret nobody tells you at first: Perfume needs layers.
Think of it like building a house. You can’t just have a roof; you need a foundation. In the perfume world, we call this layering. It turns a simple smell into a real perfume that evolves and lasts all day.
And you aren’t alone in wanting better options. Actually, around 62% of people now prefer natural scents over synthetic ones because we’re all thinking more about what goes on our skin.
So, how do we get that store-bought staying power without the chemicals?
In this guide, we are going to break it down. No complex chemistry talk. Just a simple, step-by-step way to turn your collection of oils—maybe some pure ones from Aroma Monk—into a signature scent that actually stays with you.
Ready to stop guessing and start blending? Let’s get to work.
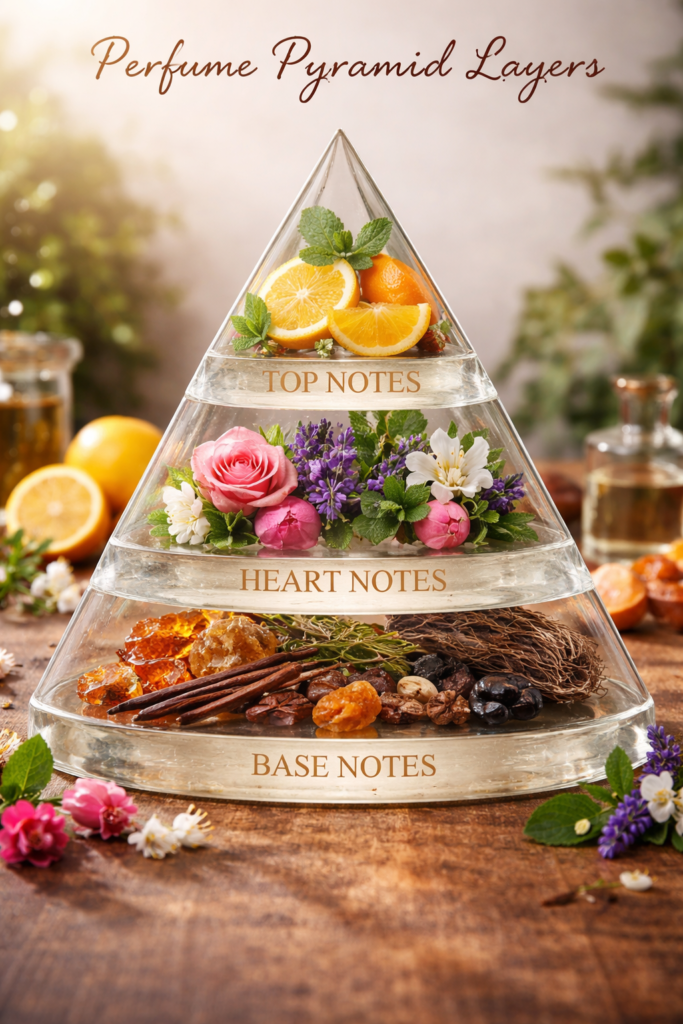
1. The Foundation: Understanding the Perfume Pyramid (Top, Middle, & Base Notes)
You wouldn’t try to build a house starting with the roof, right? It would just collapse.
Well, making perfume actually works the exact same way. If you just throw a bunch of random scents together because they smell nice in the bottle, you usually end up with a muddy mess—or worse, a scent that vanishes before you even leave the bathroom.
To get that professional “signature scent” vibe, you need to understand structure. In the industry, we call this The Perfume Pyramid.
It’s basically a fancy way of saying that different oils dry at different speeds. When you get the balance right, your perfume tells a story that changes throughout the day. It’s not just a smell; it’s an experience.
Here is how the perfume notes explained simply look in practice:
The Top Notes: The “Hello”
These are the very first notes you smell when you open the bottle or spray it on your skin. They are light, fresh, and grab your attention immediately.
But here’s the catch—they are super volatile.
This means they evaporate really fast, usually disappearing within 5 to 15 minutes. Their whole job is to make a great first impression and then step back to let the other oils shine.
- Common Scents: Citrus (Lemon, Bergamot, Grapefruit), Herbs (Peppermint, Basil), and Eucalyptus.
- The Vibe: Bright, sharp, and energetic.
The Middle Notes: The “Heart”
Once the initial burst of the top notes fades, the middle notes come out to play. We call them the “heart” notes because they make up the core of your perfume blend.
These are usually softer and more rounded. They bridge the gap between the sharp top notes and the heavy base notes, holding the whole blend together. Without them, your perfume would smell disjointed. They typically stick around for about 2 to 4 hours on the skin.
- Common Scents: Florals (Rose, Jasmine, Lavender, Geranium) and Spices (Cinnamon, Black Pepper).
- The Vibe: Warm, balanced, and full-bodied.
The Base Notes: The “Anchor”
This is where the magic (and the staying power) happens.
Base notes are made of heavy, dense molecules that evaporate very slowly—sometimes lasting 6 to 24 hours or even longer. They are the foundation that anchors the lighter notes so they don’t float away too fast.
If you’ve ever wondered why your DIY perfume with essential oils didn’t last, it’s probably because you skimp on these. They add depth and richness that simple blends just don’t have.
- Common Scents: Woods (Sandalwood, Cedarwood), Resins (Frankincense, Myrrh), and Earthy scents (Vetiver, Patchouli).
- The Vibe: Deep, rich, and lingering.
Quick Tip: The quality of your base notes matters a ton here. A high-quality, pure Sandalwood or Vetiver from a specialized supplier like Aroma Monk is going to have much better fixative properties (staying power) than cheaper, diluted versions you might find at a grocery store. If you want it to last, start with the good stuff.
So, when you are blending essential oils for perfume, don’t just pick scents you like. Pick a team—a quarterback (Top), a midfielder (Middle), and a goalie (Base).
Now that we know the players, let’s talk about the gear you need to start mixing.
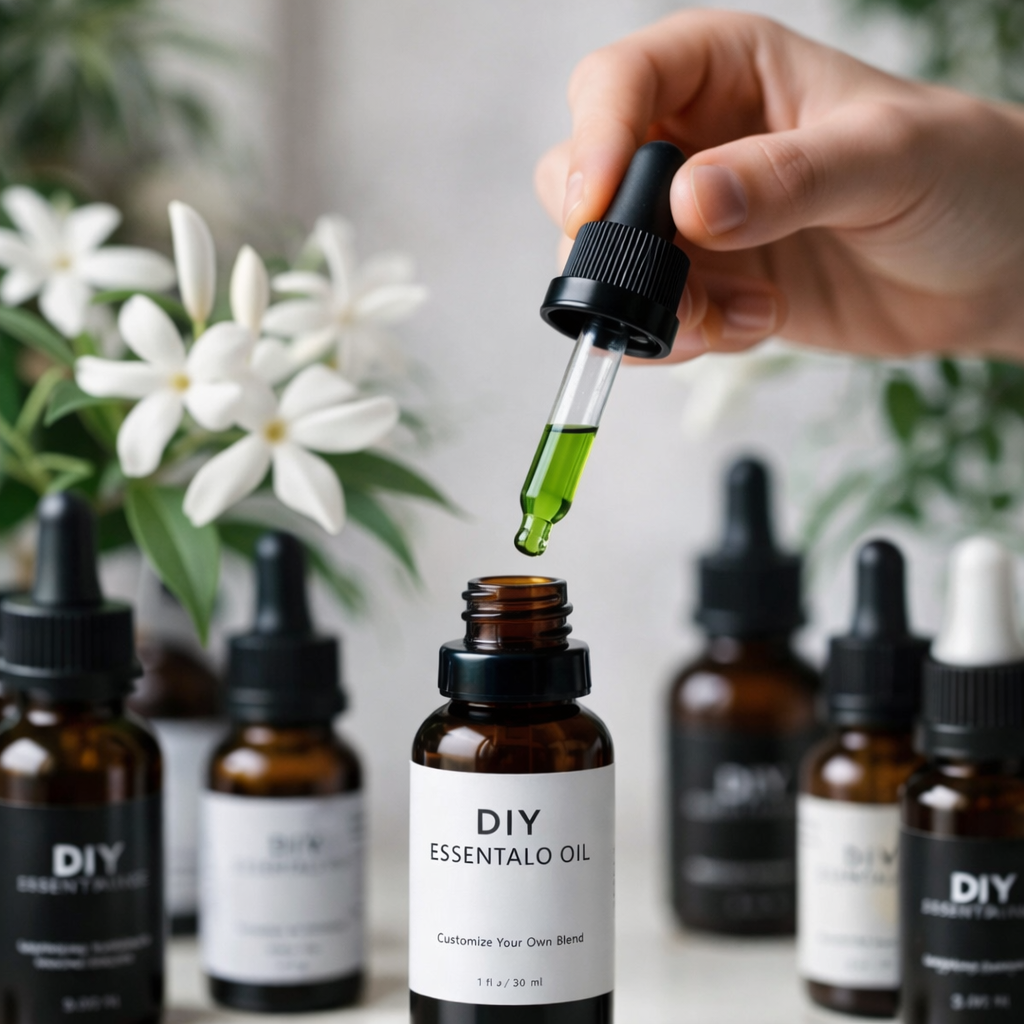
2. Essential Tools & Ingredients for Your DIY Perfume Lab
So, you know the notes. You’ve got your “players.” Now you need a field for them to play on.
Good news: You don’t need a fancy science lab.
You just need a few specific tools to keep things clean and safe. When I first started, I used plastic cups to mix my oils. Bad idea. The oils actually ate right through the bottom of the cup.
Weird, right? But that’s how potent these plant extracts are.
Here is your simple shopping list to do this right.
The Vehicle: Oil vs. Alcohol
You have to pick a lane here. Are you making a roll-on or a spray?
For Roll-Ons (The Oil Path):
This is usually the easiest way to start. You need a “carrier oil” to dilute the potent essential oils so they don’t burn your skin.
- Jojoba Oil: This is the gold standard. Technically, it’s a liquid wax that matches your skin’s natural oils almost perfectly. It doesn’t go rancid quickly—it can last 1 to 2 years—and it isn’t greasy.
- Fractionated Coconut Oil: Another solid option. It stays liquid and has zero smell, but Jojoba feels a bit more luxurious on the wrist.
For Sprays (The Alcohol Path):
Want that cloud of scent that follows you around? You need alcohol.
But grab the strong stuff. Regular vodka (80 proof) has too much water and won’t mix with the oils properly. You need 190-proof alcohol (like Everclear or specialized Perfumer’s Alcohol). This high alcohol content evaporates fast, leaving just the scent behind.
The Hardware
- Dark Glass Bottles: Light kills scent. Sunlight breaks down delicate oils like Lemon or Lavender pretty fast. Always store your homemade perfume in amber or cobalt blue glass bottles to protect it.
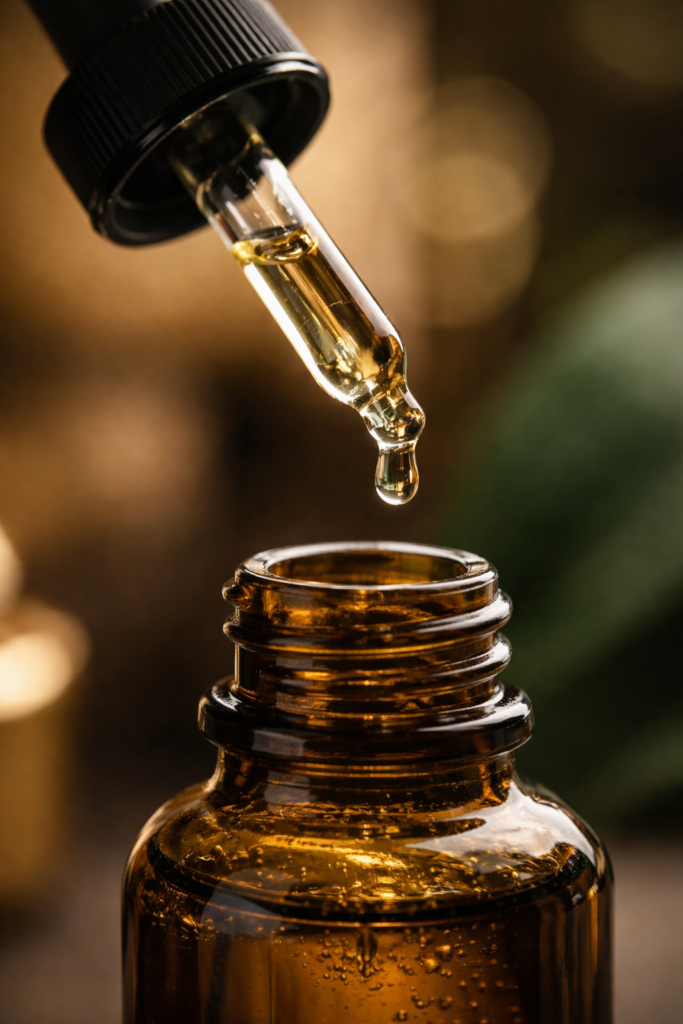
- Glass Droppers: Remember the melting plastic cup story? Essential oils are strong solvents. Always use glass droppers or pipettes to measure.
- Testing Strips: Professional perfumers don’t test on their skin immediately. They use paper strips. You can buy these cheap, or honestly? Cut up a coffee filter. It works just as well for checking your create your own perfume blend before you commit.
The Ingredients: Why Quality Matters
This is the big one.
Since you are applying this natural perfume recipe to your body, quality isn’t just about the smell—it’s about safety.
Lots of “essential oils” at discount stores are actually synthetic fragrance oils. They might smell okay for five minutes, but they lack the depth of the real thing. Plus, they can irritate your skin.
Look for “100% Pure” on the label. If it smells like candy, it’s probably fake.
If you want to be sure, sourcing from a dedicated supplier like Aroma Monk ensures you’re getting lab-tested purity. Their oils are the real deal, which means your perfume won’t just smell better—it will actually be safer to wear.
Got your gear? Good.
Now comes the fun part. Let’s start mixing.
3. The Blending Blueprint: A Step-by-Step Layering Process
Okay, look. This is the part where most people get too excited and mess it up.
You have your bottles lined up. Maybe you picked up some pure, lab-tested oils from Aroma Monk and you are dying to smell amazing. I get it.
But if you just start dropping oils into a bottle willy-nilly, you won’t get a signature scent. You’ll get something that smells weirdly like mud or cough syrup.
Here is how to make essential oil perfume the right way, using a structure that actually works.
The Golden Ratio: 30-50-20
If you don’t know where to start, follow the math.
Professional perfumers have hundreds of years of trial and error behind them. They figured out a ratio that creates a balanced, round scent profile. It’s called the 30-50-20 rule.
- 30% Top Notes (The Hello)
- 50% Middle Notes (The Heart)
- 20% Base Notes (The Anchor)
Let’s say you are making a small test batch of 10 drops total. Your natural perfume recipe would look like this:
- 3 drops of Top note (like Grapefruit)
- 5 drops of Middle note (like Lavender)
- 2 drops of Base note (like Sandalwood)
Is this a hard law you can never break? No.
Actually, some aromatherapists prefer a 20-50-30 split if they want the scent to last longer.
But when you are learning how to make essential oil perfume, stick to the 30-50-20 rule first. Once you know the rules, then you can break them.
Build from the Bottom Up
Imagine you are dressing a salad. You don’t put the dressing in the bowl before the lettuce, right?
Order matters.
When you create your own perfume blend, you want to build a stable foundation. We call this the “Bottom-Up” method.
- Start with the Base: Add your drops of Sandalwood, Vetiver, or Vanilla first. These heavy oils sit at the bottom and wait.
- Add the Middle: Drop in your florals or spices. Swirl the bottle gently. Let them meet the base notes.
- Finish with the Top: efficient scents like Citrus go in last.
Why does this matter?
Science, mostly. It creates a stable foundation for the lighter molecules to rest on. If you do it backward, the scent profile can sometimes feel “top-heavy” and unbalanced.
The “Don’t Be Me” Rule: Write It Down
I have a sad story for you.
About three years ago, I made the best homemade perfume I’ve ever smelled. It was woody, spicy, and had this little kick of orange. It was perfect.
But I was in a rush. I didn’t write down the drop count.
I have tried to recreate that scent probably fifty times since then. I can’t do it. It’s gone forever.
Don’t be me.
Get a notebook. Create a “Perfume Recipe Card” for every single attempt. Even the bad ones.
Record this:
- Date
- Oils used (Brand matters! A drop of Aroma Monk rose is different than a drop of grocery store rose)
- Exact number of drops
- Carrier used (Alcohol or Oil)
The Hardest Part: The Waiting Game
Now, here is the secret that separates the pros from the amateurs.
Once you mix your oils and your alcohol (or carrier oil), you need to walk away.
Seriously. Put the cap on, shake it good, put it in a dark cupboard, and leave it alone.
This is called “maturation” or maceration. It’s where the chemistry happens. The harsh edge of the alcohol softens up, and the different oils start to bond together into a single, new scent.
If you smell it right away, it might smell disjointed. Give it 48 hours minimum. But if you can wait 4 to 6 weeks? That is when the magic happens.
Now that you have your blend resting in the dark, you might be wondering—does this stuff actually last on my skin? Or is it going to fade by lunchtime?
Let’s talk about staying power.
4. Scent Recipes: 3 Beginner-Friendly Blends to Get You Started
Okay, enough theory.
Let’s get messy.
(In a good way, I promise.)
The hardest part of learning how to make essential oil perfume is staring at all those bottles and wondering, “What actually smells good together?”
It can be paralyzing. You don’t want to waste expensive drops on a bad experiment.
To help you out, I’ve put together three fool-proof recipes based on the fragrance families professional perfumers use. These are designed for a standard 10ml glass rollerball bottle.
For all of these, your method is the same:
- Add the essential oil drops.
- Fill the rest of the bottle with your carrier oil (like Jojoba).
- Snap the rollerball on and shake.
Here are three vibes to get you started.
Recipe 1: The “Date Night” (Sensual Woods & Floral)
This one is soft, romantic, and perfect for when you want to feel a little fancy. It leans feminine but honestly smells great on anyone who likes warm florals.
- The Base (4 drops): Sandalwood. This adds a creamy, woody richness that lingers on the skin.
- The Middle (10 drops): Ylang Ylang. Be careful with this one—it’s potent! It brings a deep, exotic flower scent.
- The Top (6 drops): Bergamot. This isn’t just regular orange; it’s complex and earl-grey-tea-like, cutting through the sweetness of the Ylang Ylang.
Recipe 2: The “Focus Mode” (Spiced Citrus Earth)
I wear this when I have a deadline. It’s grounding but keeps you awake. It’s a great unisex or masculine blend that feels very high-end.
- The Base (4 drops): Frankincense. Smoky, resinous, and calming.
- The Middle (10 drops): Black Pepper. Sounds weird? Trust me. It adds a warm, spicy kick that isn’t overpowering.
- The Top (6 drops): Sweet Orange. Bright and cheerful to balance out the heavy smoke and spice.
Recipe 3: The “Sunday Morning” (Fresh & Uplifting Garden)
This is liquid sunshine. It’s clean, light, and perfect for daytime wear. If you are just starting your DIY perfume with essential oils journey, this is the safest place to begin.
- The Base (4 drops): Cedarwood. Smell like a fresh forest.
- The Middle (10 drops): Lavender. The classic floral that calms everything down.
- The Top (6 drops): Grapefruit. Zesty and sharp. It wakes up the lavender so it doesn’t smell like a sleep aid.
A Trick for Testing Before You Pour
Not sure if you will like these combos? Don’t commit yet.
Professional “noses” (that’s what they call perfume creators) use the “Blotter Strip” method. You dip paper strips into different oils and fan them together under your nose to see how the molecules interact in the air.
Also, a quick reality check on ingredients.
These recipes rely on the oils being pure. If you use a cheap “sandalwood scented” oil from a craft store, it won’t anchor your perfume. It will likely just smell like a candle shop.
Using verified, pure extracts from suppliers like Aroma Monk ensures that when you add 4 drops of base note, you are actually getting the chemical weight and staying power needed to hold the scent together.
Now that you have your recipe mixed, you might be wondering where to actually put it on your body for the best effect. Wrists? Neck? Behind the knees?
Let’s look at how to wear it properly.
5. The Final Touches: Diluting, Maturing, and Storing Your Creation
So you have your “master blend.”
It smells incredible in the bottle. But you can’t just slather that pure stuff on your skin. It’s way too strong, and honestly? It would burn a hole in your wallet to use it undiluted.
Here is how to finish the job properly.
Perfecting the Dilution
Turning your blend into a wearable perfume is all about the ratio. You are basically watering it down (well, oiling it down) to make it safe.
For a standard 10ml roller bottle, here is your cheat sheet:
- Pour your scent: Add 20 to 30 drops of your essential oil blend.
- Fill the rest: Top it off with your Jojoba oil or high-proof alcohol.
That’s it.
This creates a concentration of about 15% to 20%. In the fancy French perfume world, they call this Eau de Parfum. It’s the sweet spot—strong enough to last all day, but not so strong that you knock out your coworkers in the elevator.
The Art of Patience (The “Chili” Rule)
Now, I have some bad news.
You can’t use it yet.
I know, I know. You want to wear it now. But have you ever noticed that chili or lasagna tastes better the next day?
Perfume is the exact same. It needs to “stew.”
If you use alcohol, it smells super sharp and harsh at first. You need to let the bottle sit in a dark place for 2 to 6 weeks.
During this time, chemical reactions happen. The harsh alcohol edges wear off, and the essential oils actually bond together to become a single, smooth scent. We call this “curing” or maturing.
If you use oil (like Jojoba), you don’t have to wait as long. But give it at least 48 hours. Trust me, it makes a huge difference.
Keep It Like a Vampire
Once your perfume is ready, you need to protect it.
Here is the enemy of all scent: Sunlight.
UV rays break down natural molecules fast. If you leave a citrus blend on your windowsill, that fresh lemon smell will turn sour or just disappear really quickly.
- Keep it cool: Don’t store it in a steamy bathroom.
- Keep it dark: Ensure those bottles are amber or blue glass.
When you buy high-quality ingredients—especially if you’ve invested in pure goods from Aroma Monk—you want them to last. Treat them right, and they will stay fresh for a year or more.
What’s Next?
You did it. You aren’t just buying perfume anymore; you’re making it.
If you really catch the bug (and you probably will), you can start looking into advanced stuff like making your own alcohol tinctures with vanilla beans or working with “absolutes.”
But for now?
Cap that bottle. Shake it up. And get ready to tell everyone, “Oh this? Yeah, I made it.”
Your Journey as a Natural Perfumer Begins Now
You’ve got the knowledge. You’ve got the recipes. And hopefully, you’ve got a few amber bottles waiting in a dark cupboard.
Remember, this isn’t just about smelling good. It’s about creating something that is uniquely you.
We covered the heavy lifting—understanding the top, middle, and base notes. We talked about why that 30-50-20 ratio usually works best (and how to break it later). And we definitely learned why patience is the hardest ingredient of all.
But the best part? There is no “wrong” answer here.
Jean-Claude Ellena, a legendary perfumer, once described perfume as the “translation of memories into scent”.
That’s really what you are doing. You are capturing a feeling in a bottle.
Whether you stick to the “Date Night” natural perfume recipe I shared or go rogue and invent something totally new with a stash of Aroma Monk oils, the process is the prize.
So, I have to ask.
Which scent combination are you most excited to try first? Are you a “Sunday Morning” person, or are you going for something darker and moodier?
Drop a comment below and let me know what you’re brewing. I’d love to hear about it.